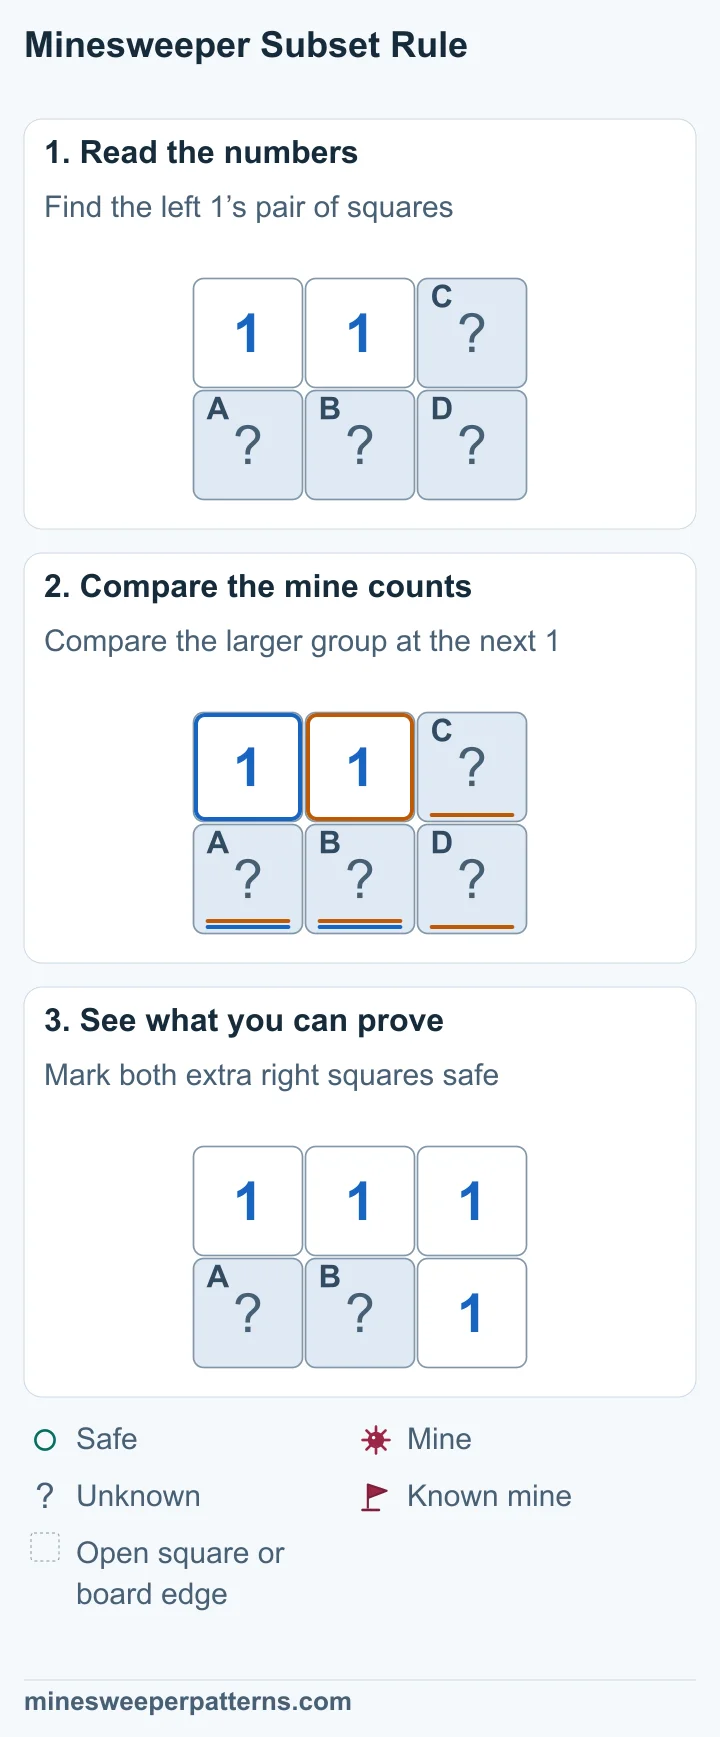
Two numbers can count mines in the same group of squares, with one number also counting extra squares. Compare their mine counts to learn about those extra squares. This is called the subset rule.
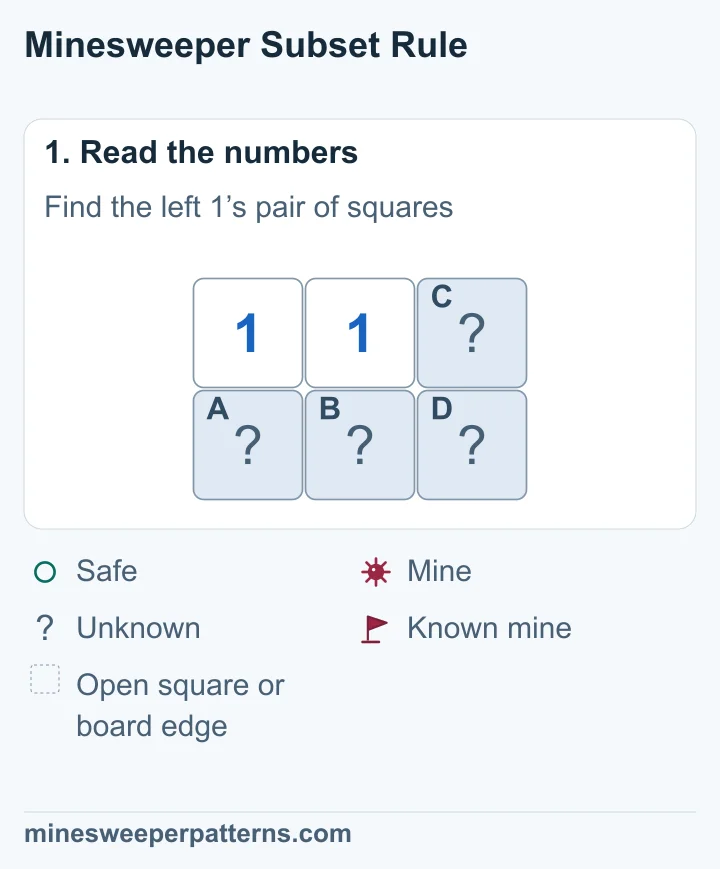
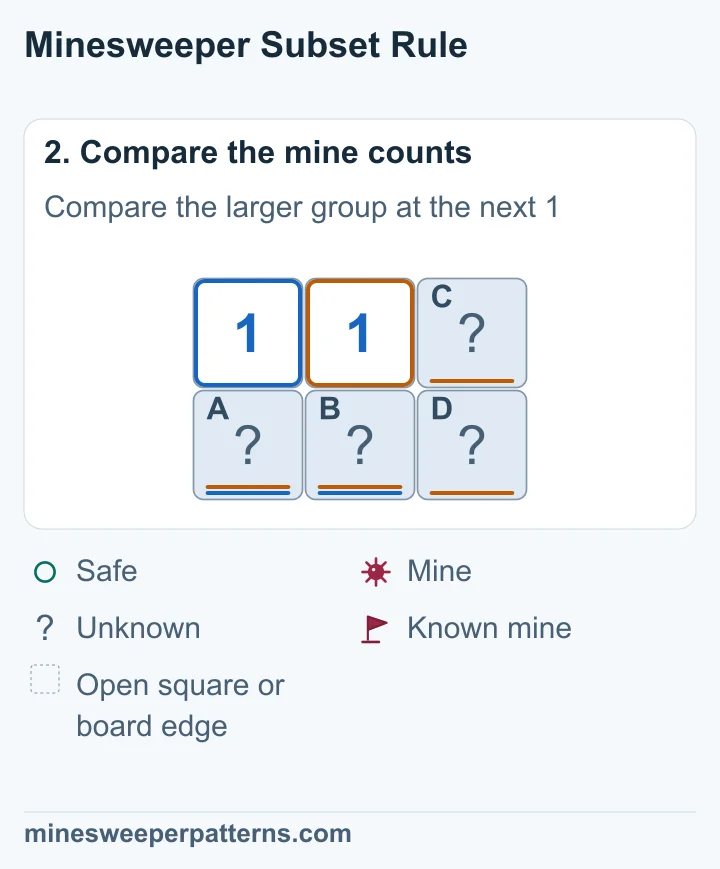
The left 1 counts mines in A and B below it. The middle 1 counts mines in A, B, C and D. C is at the top right. D is at the bottom right. These are all the squares left to check around the two numbers.
Before
After
Why it works
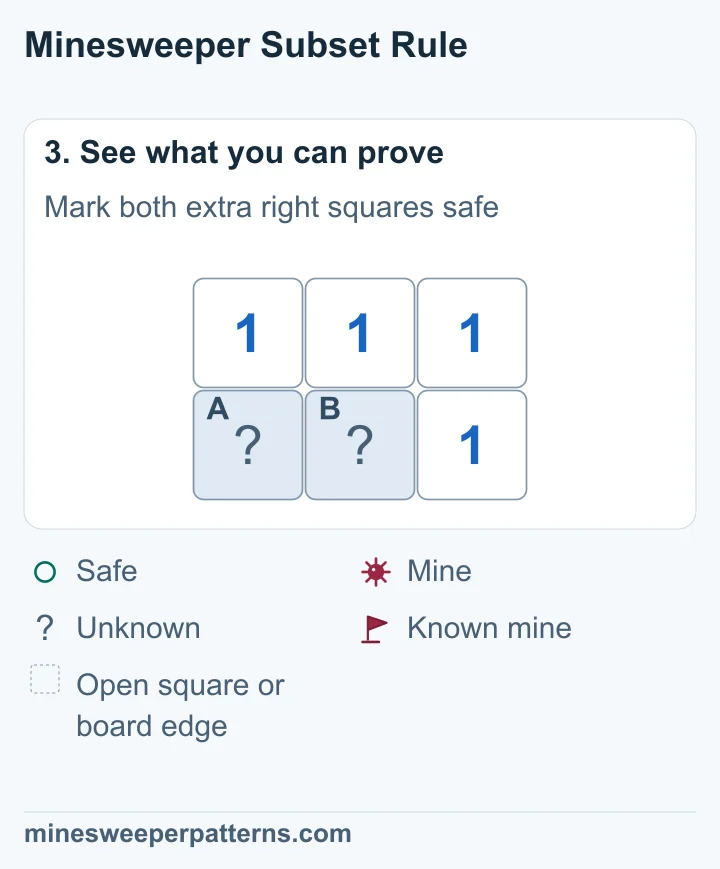
A and B contain the one mine counted by both numbers. That leaves 0 mines in C and D, so both are safe. Either A or B could hold the mine. In the picture, C and D open to show 1s. These new numbers then show that B has the mine.
The rule
Subtract known mines from each number. Then compare the groups of unknown squares. The larger group must include every square in the smaller group. Subtract the smaller group’s mine count from the larger group’s count. The result is the mine count in the extra squares.
What to check
Include the corners when you compare the groups. Every square in the smaller group must also be in the larger group. Count mines that the numbers prove. You can find a safe square while some mine locations are still unknown.
Compare groups to solve 2-1-2
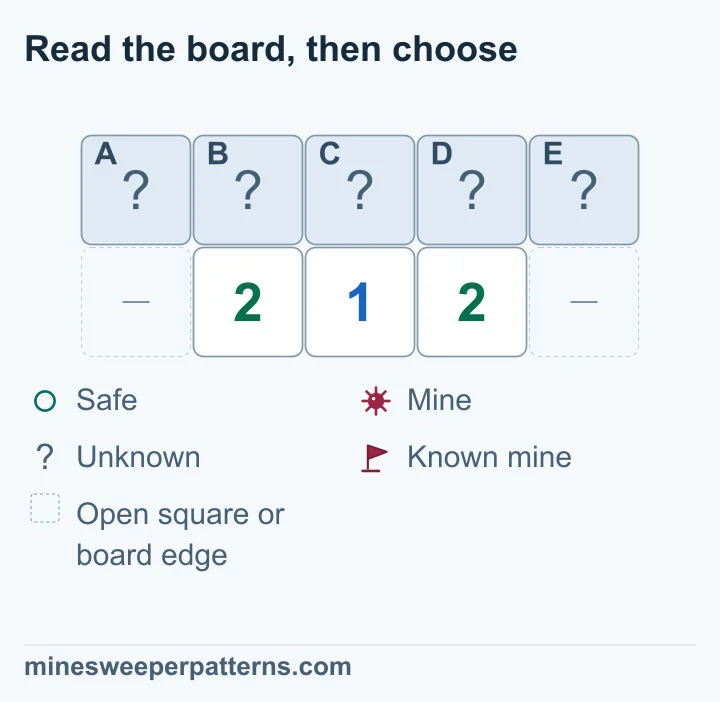
When one group contains every square in another group, subtract their mine counts. Equal counts make the extra squares safe. A difference of one means the extra squares hold one mine. Group subtraction also solves five covered squares, A through E, above 2-1-2. The left 2 gives A + B + C = 2. The middle 1 gives B + C + D = 1. Subtracting gives A − D = 1: A is a mine and D is safe. The right 2 gives C + D + E = 2. Subtract the middle count to get E − B = 1: E is a mine and B is safe. The middle 1 then makes C a mine.
Read the board, then choose
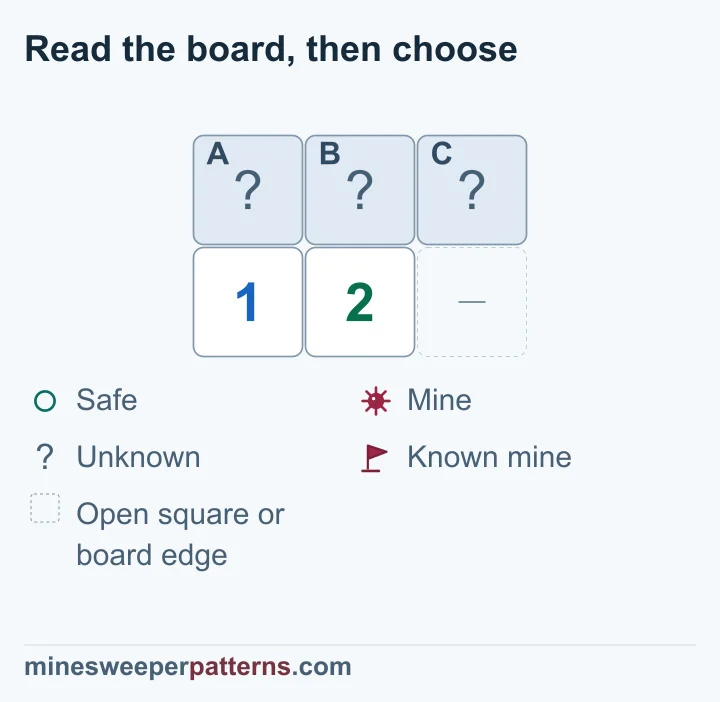
Every covered square in the smaller group must also belong to the larger group. Then subtract the mine counts. If A + B = 1 and A + B + C = 2, C = 1. If the remaining mine counts match, the extra squares are safe.
ABC12
Choose a covered square. Then decide whether it is safe, has a mine, or needs more information.
Why this answer is correct
A: Not enough information · B: Not enough information · C: Mine
The shown covered squares are the only unknown squares around these numbers. Gaps stand for open squares or the board edge. Check every nearby square before you apply the result. Flags in these examples mark known mines.
Read the board, then choose
Only A–E are covered above 2-1-2. The middle number gives B + C + D = 1. The left 2 gives A + B + C = 2. Subtracting gives A − D = 1: A has a mine, and D is safe. The right 2 then proves E has a mine and B is safe. C holds the remaining mine.
ABCDE212
Choose a covered square. Then decide whether it is safe, has a mine, or needs more information.
Why this answer is correct
A: Mine · B: Safe · C: Mine · D: Safe · E: Mine
The shown covered squares are the only unknown squares around these numbers. Gaps stand for open squares or the board edge. Check every nearby square before you apply the result. Flags in these examples mark known mines.
Read the board, then choose
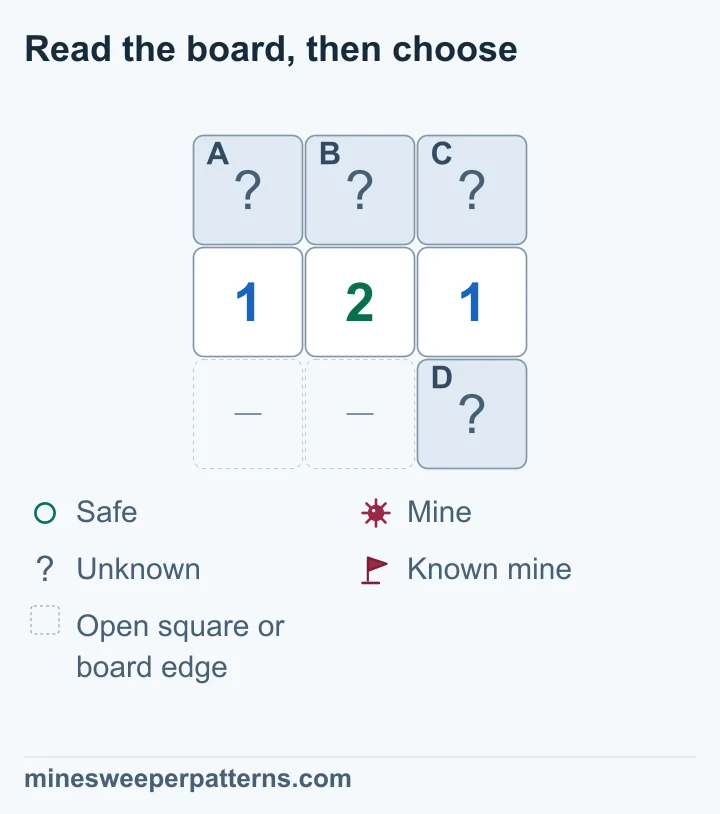
The extra covered square beside the right 1 changes what you can prove. Check every square around the numbers before you apply a pattern.
ABC121D
Choose a covered square. Then decide whether it is safe, has a mine, or needs more information.
Why this answer is correct
A: Mine · B: Safe · C: Not enough information · D: Not enough information
The shown covered squares are the only unknown squares around these numbers. Gaps stand for open squares or the board edge. Check every nearby square before you apply the result. Flags in these examples mark known mines.
Read the board, then choose
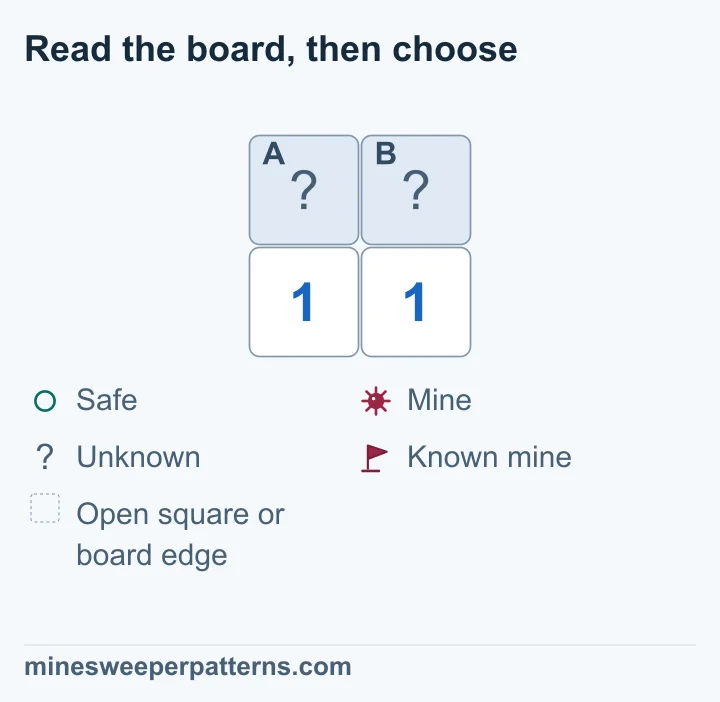
The 1 touches A and B. A + B = 1. Either square could have the mine. Choose “Not enough information” for either square.
AB11
Choose a covered square. Then decide whether it is safe, has a mine, or needs more information.
Why this answer is correct
A: Not enough information · B: Not enough information
The shown covered squares are the only unknown squares around these numbers. Gaps stand for open squares or the board edge. Check every nearby square before you apply the result. Flags in these examples mark known mines.
Privacy
Your game records stay in this browser on this device.