Minesweeper 1-3-1 Corner Pattern

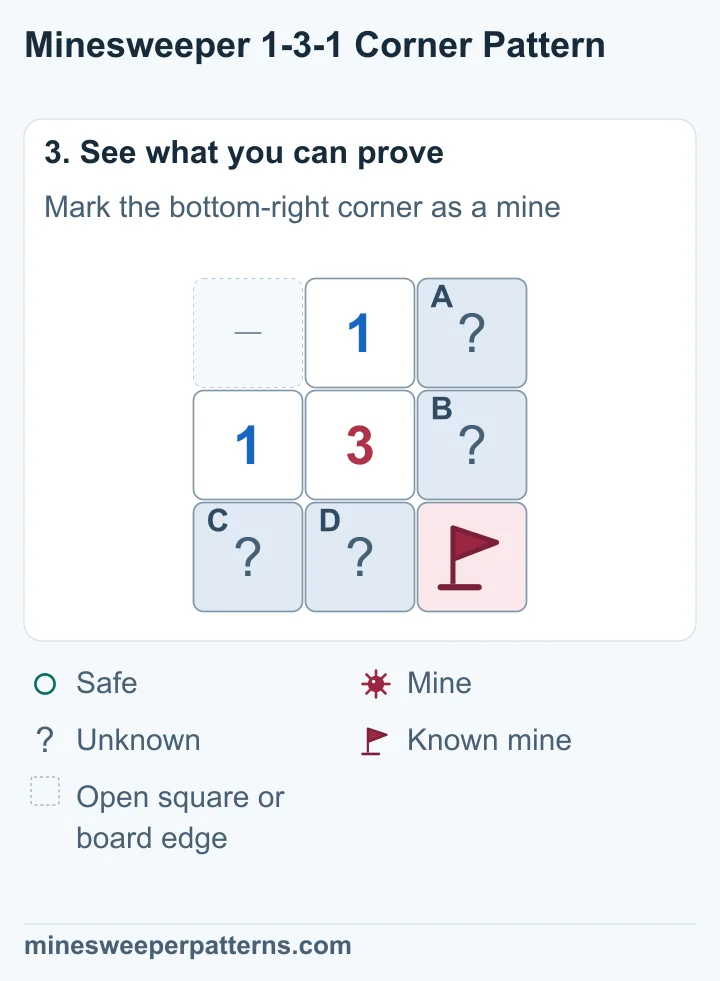
A 1 sits above a 3, and another 1 sits to its left. Five covered squares wrap around the other sides. The square diagonally below and right of the 3 has a mine.

See the pattern step by step
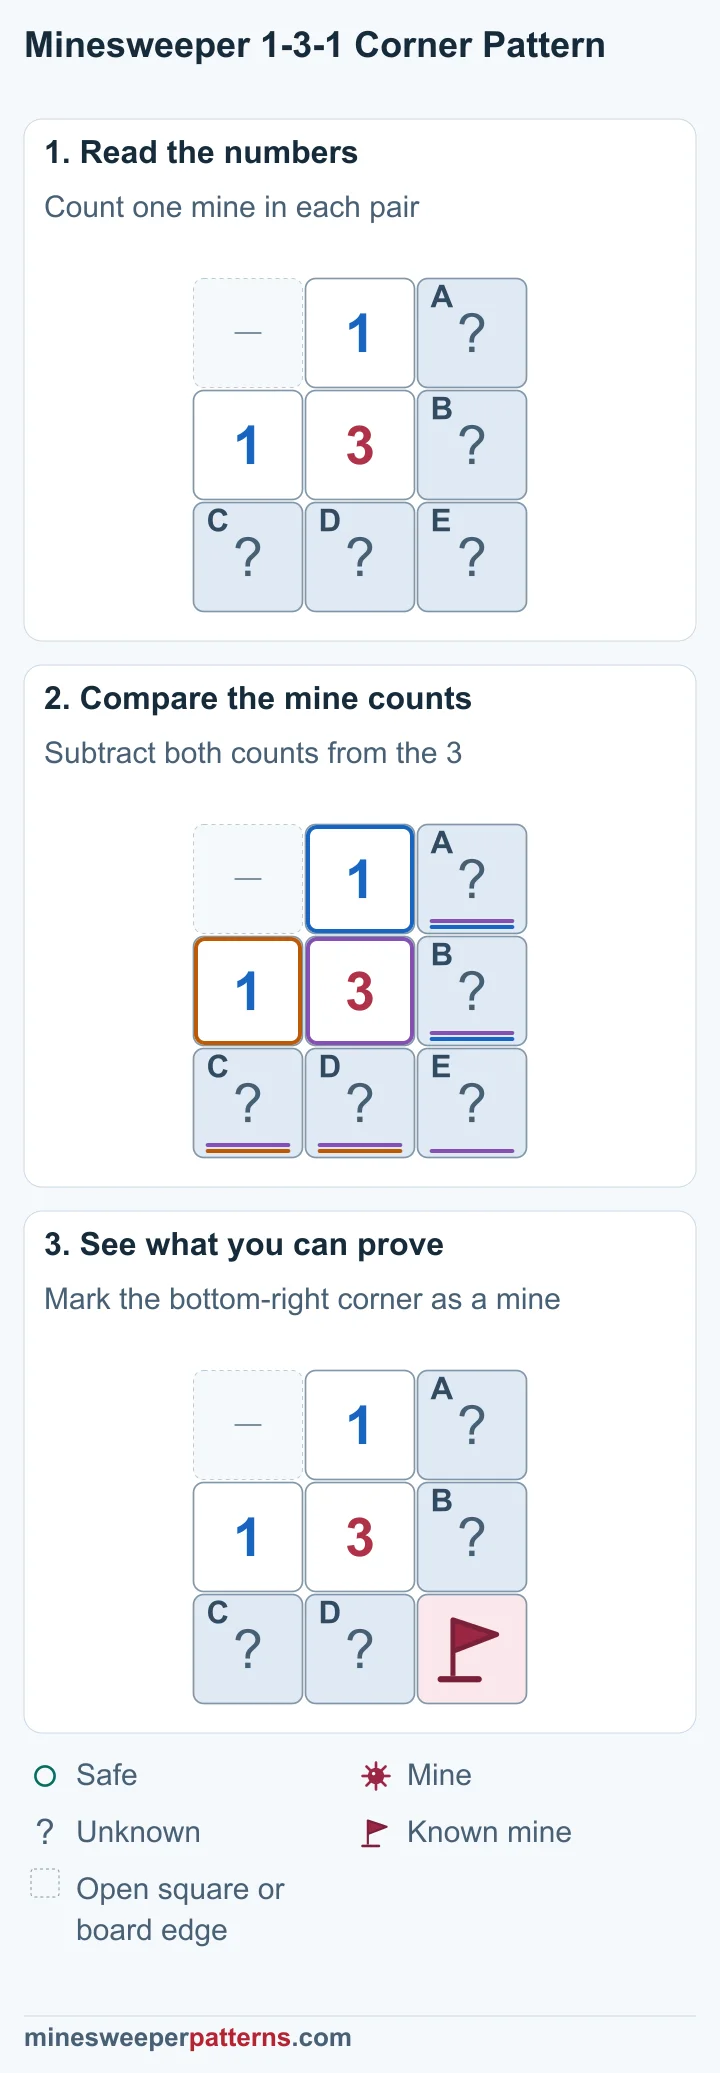
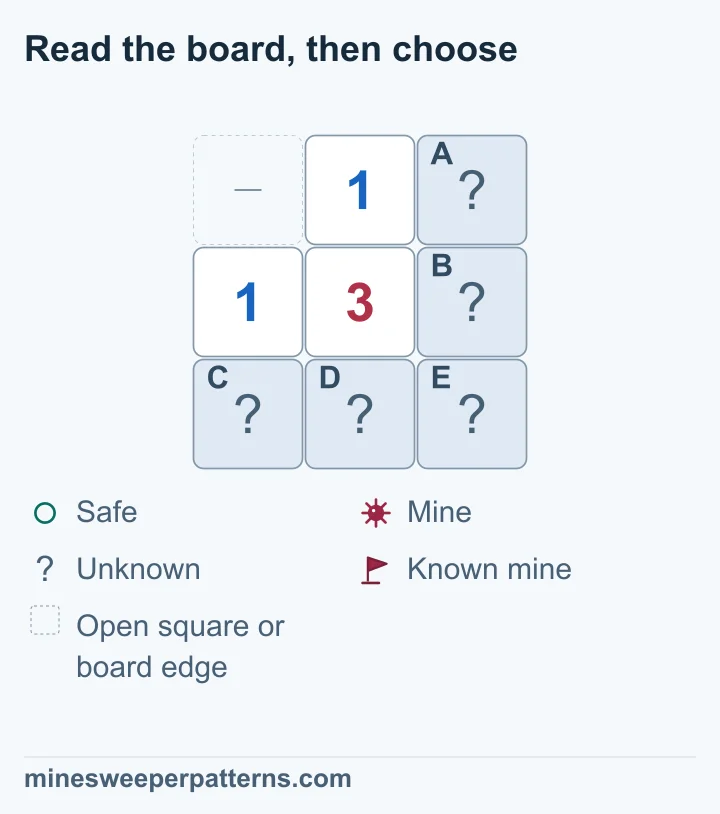
A 3 has a 1 above it and a 1 to its left. Unknown squares A and B form the right pair; C and D form the bottom pair. E is at the bottom-right corner. The upper 1 gives A + B = 1. The left 1 gives C + D = 1. The 3 counts both pairs and E, so E holds the third mine. A flag marks the mine in E, diagonally below and right of the 3. A and B still share one mine, and C and D share one mine. Their individual results remain unknown.
Download image

Board example

A + B = 1 and C + D = 1. The 3 counts all five squares: A + B + C + D + E = 3.

Before
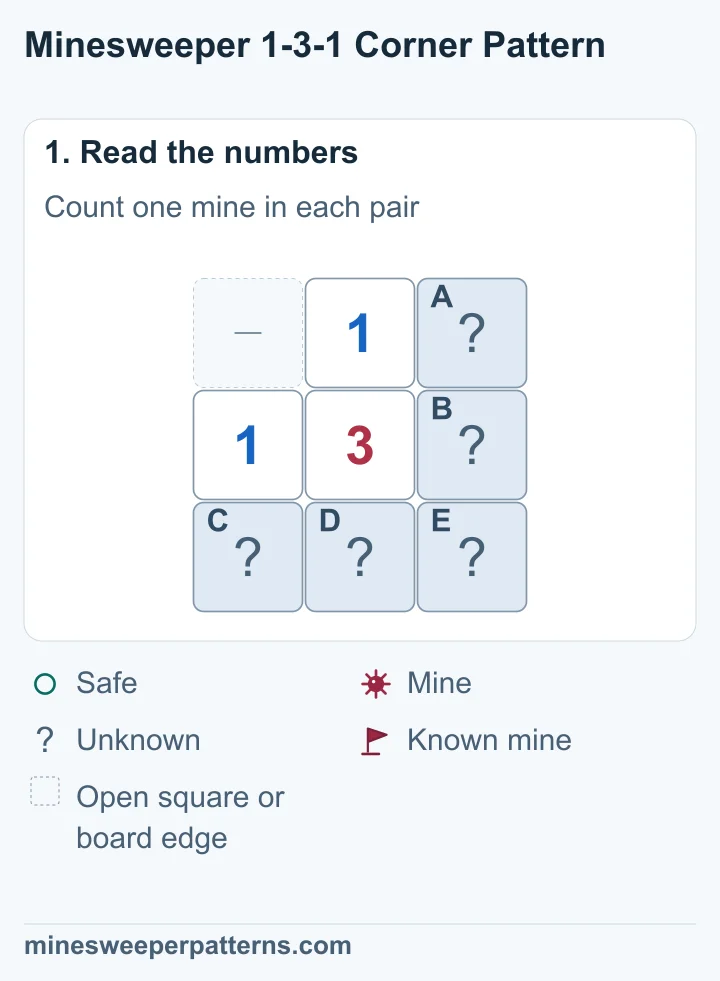
A 3 has a 1 above it and a 1 to its left. Unknown squares A and B form the right pair; C and D form the bottom pair. E is at the bottom-right corner.

After

A flag marks the mine in E, diagonally below and right of the 3. A and B still share one mine, and C and D share one mine. Their individual results remain unknown.

Why it works

Each pair holds one mine. Together, the pairs account for two of the three mines. The remaining mine must be in E: 3 − 1 − 1 = 1. Either square in each pair could still hold that pair’s mine.
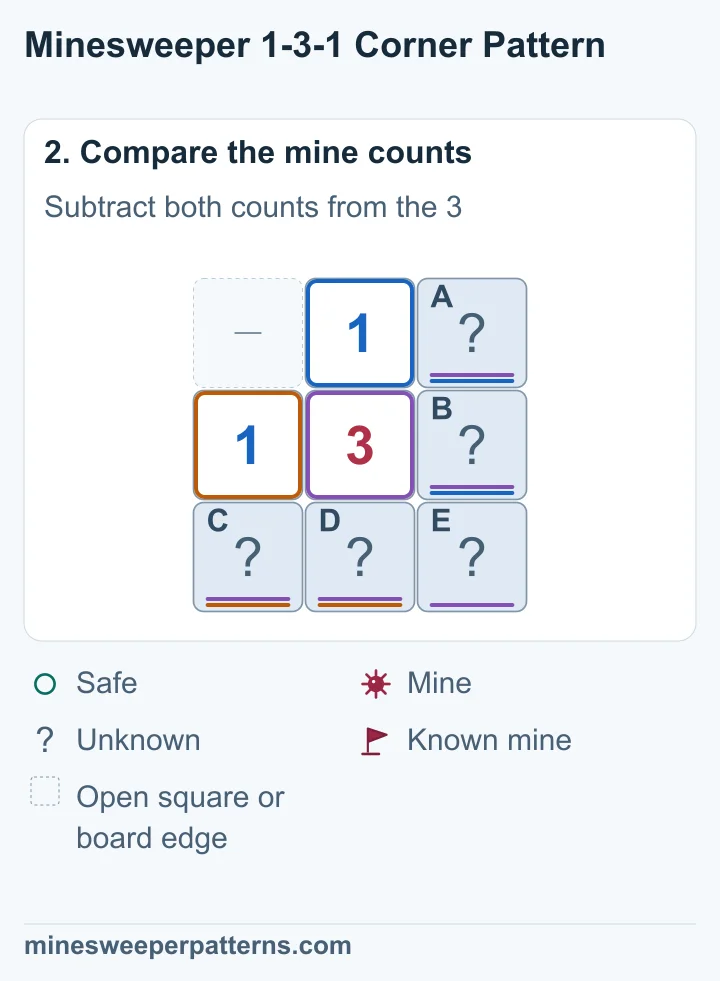
The upper 1 gives A + B = 1. The left 1 gives C + D = 1. The 3 counts both pairs and E, so E holds the third mine.

The rule

The upper 1 touches two covered squares on the right: A and B. The left 1 touches two along the bottom: C and D. The 3 touches both pairs and the bottom-right square, E.

What to check

Check the corner shape. The two pairs must be separate, and E must be the only extra unknown square around the 3. The square above and left of the 3 is open or outside the board. Its number is not shown.
Read the board, then choose

The upper 1 touches two covered squares on the right: A and B. The left 1 touches two along the bottom: C and D. The 3 touches both pairs and the bottom-right square, E.

A three-row, three-column board has a 3 in the center, a 1 above it and a 1 to its left. The top-left dash means omitted open space or board edge. Covered A and B form the right pair; C and D lie along the bottom left; E is bottom right. Each 1 requires one mine in its pair. The 3 needs a third mine in E. Both pairs remain individually unresolved and all five squares stay covered.

Choose a covered square. Then decide whether it is safe, has a mine, or needs more information.

A
B
C
D
E
Why this answer is correct

A: Not enough information · B: Not enough information · C: Not enough information · D: Not enough information · E: Mine

The shown covered squares are the only unknown squares around these numbers. Gaps stand for open squares or the board edge. Check every nearby square before you apply the result. Flags in these examples mark known mines.

Privacy

Your game records stay in this browser on this device.