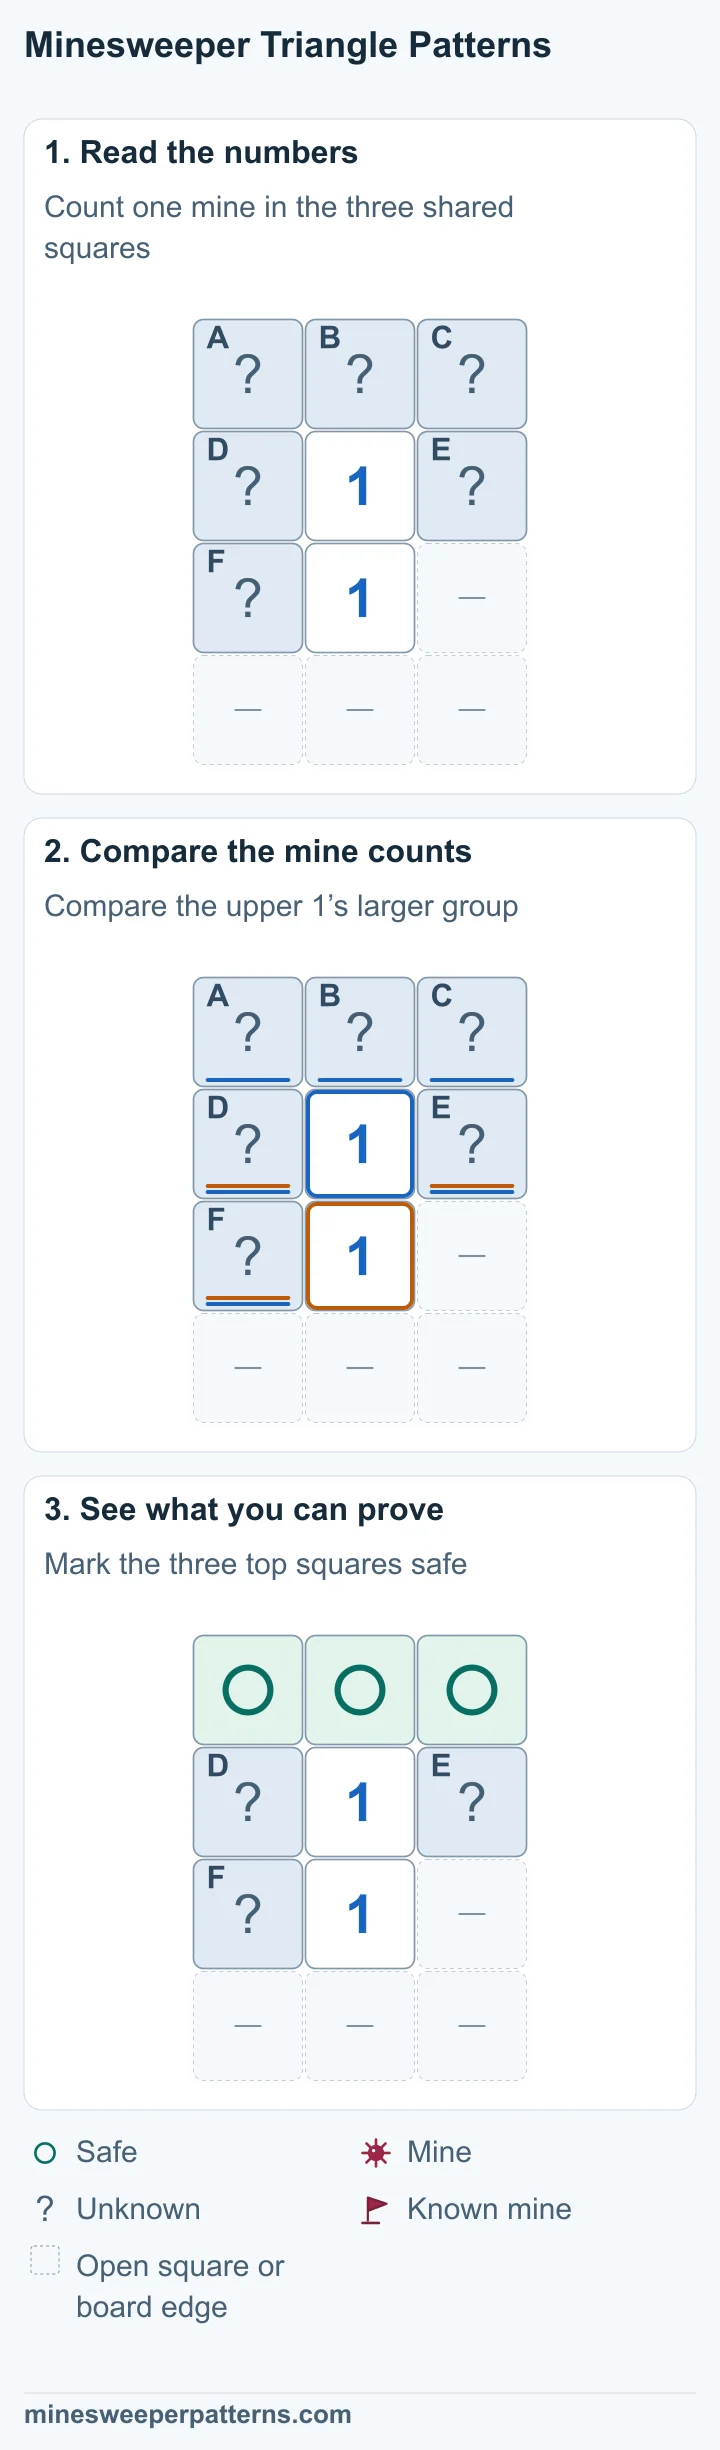
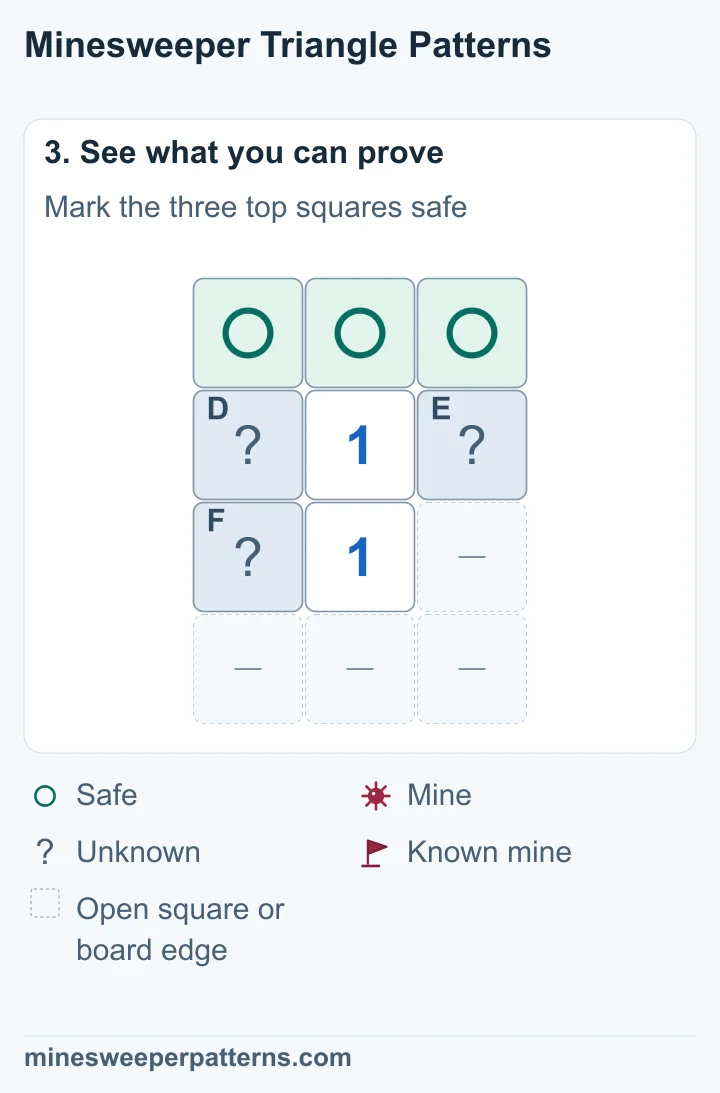
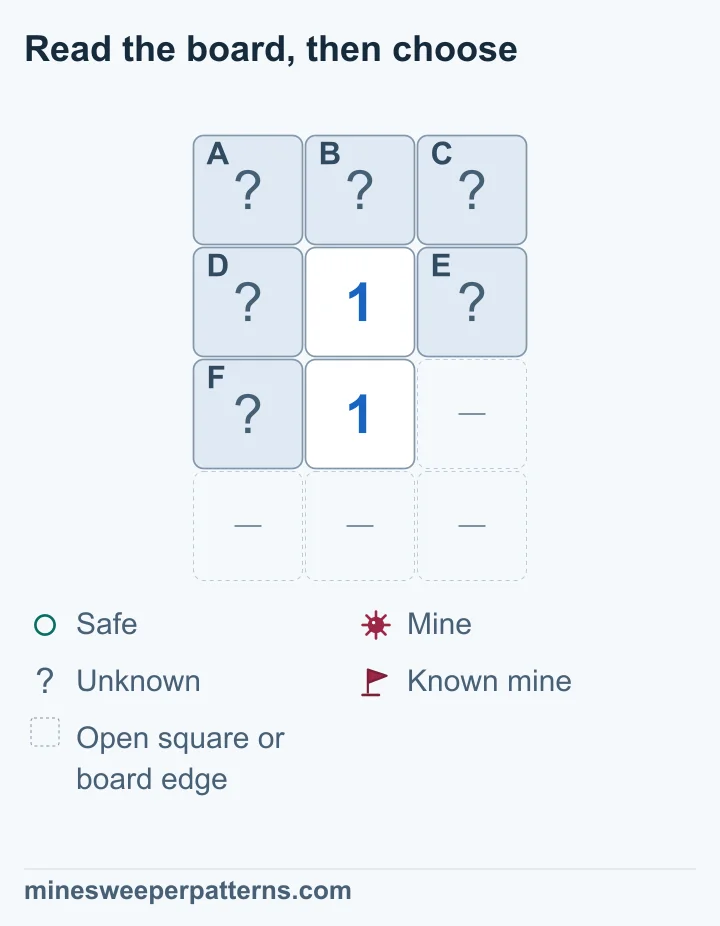
Two equal numbers can clear a whole row when they count the same group of mines. In this example, one 1 sits above another. The three covered squares above them are safe.
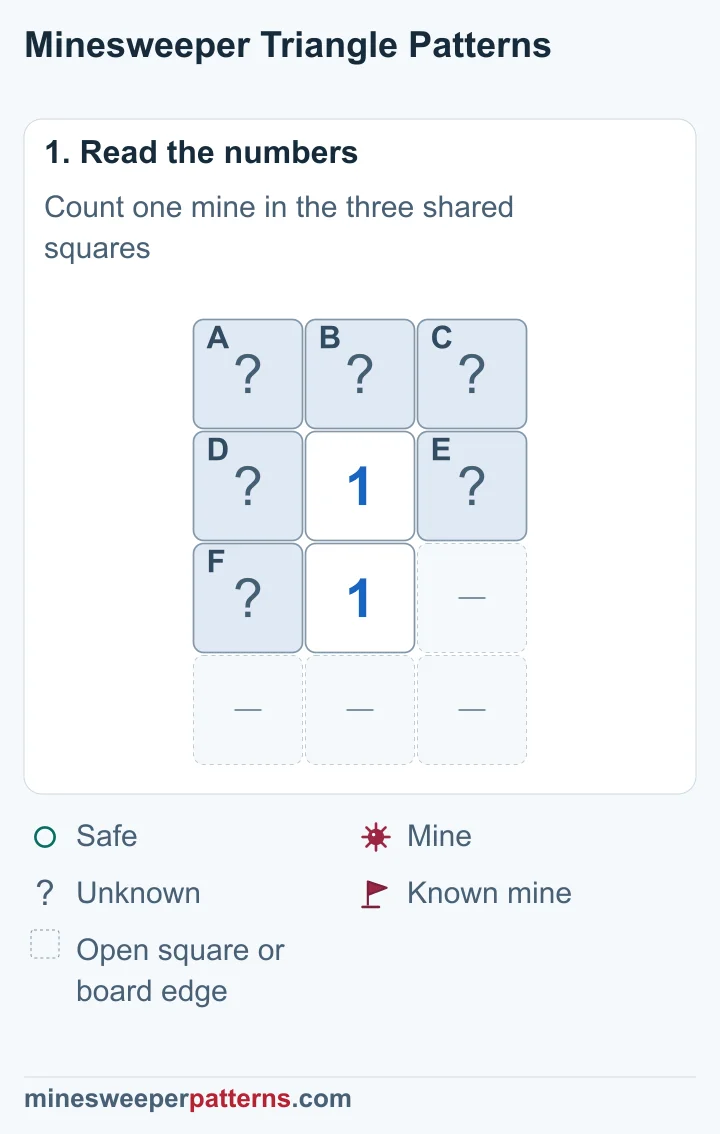
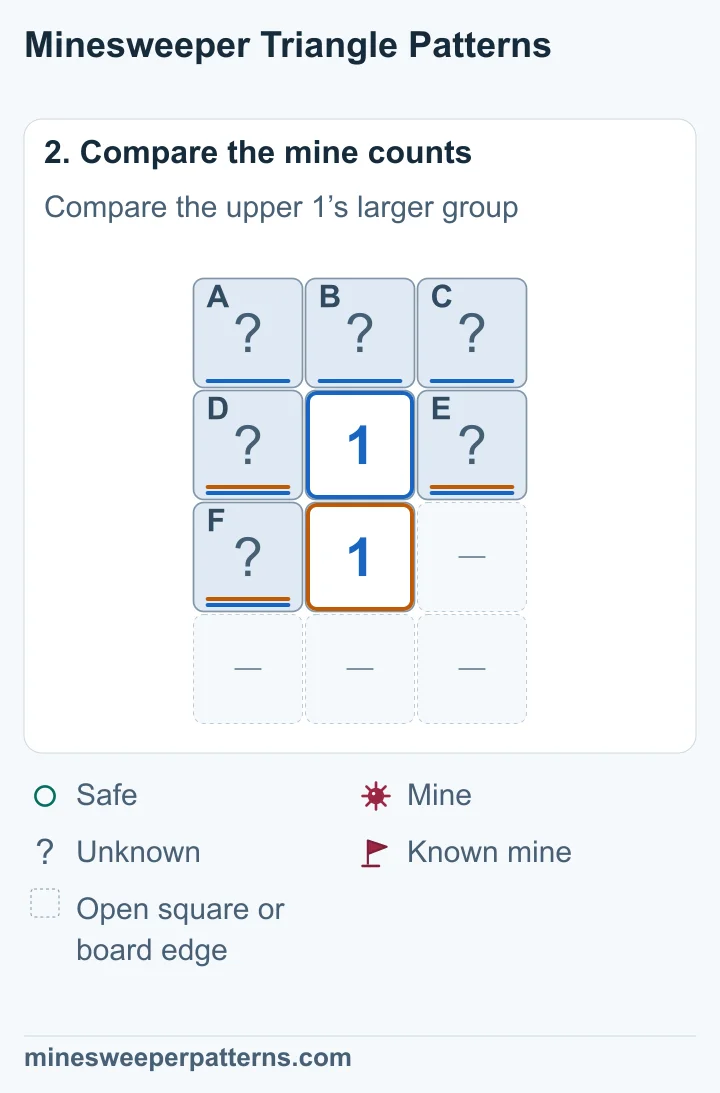
The lower clue gives D + E + F = 1. The upper clue gives A + B + C + D + E + F = 1. Subtract the shared group to get A + B + C = 0.
Before
After
Why it works
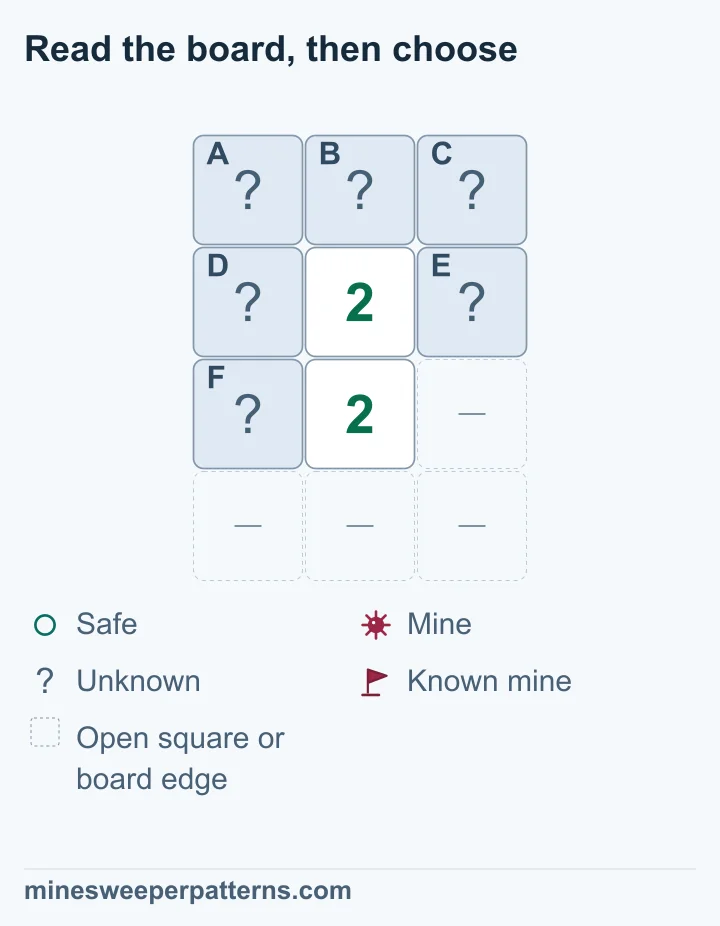
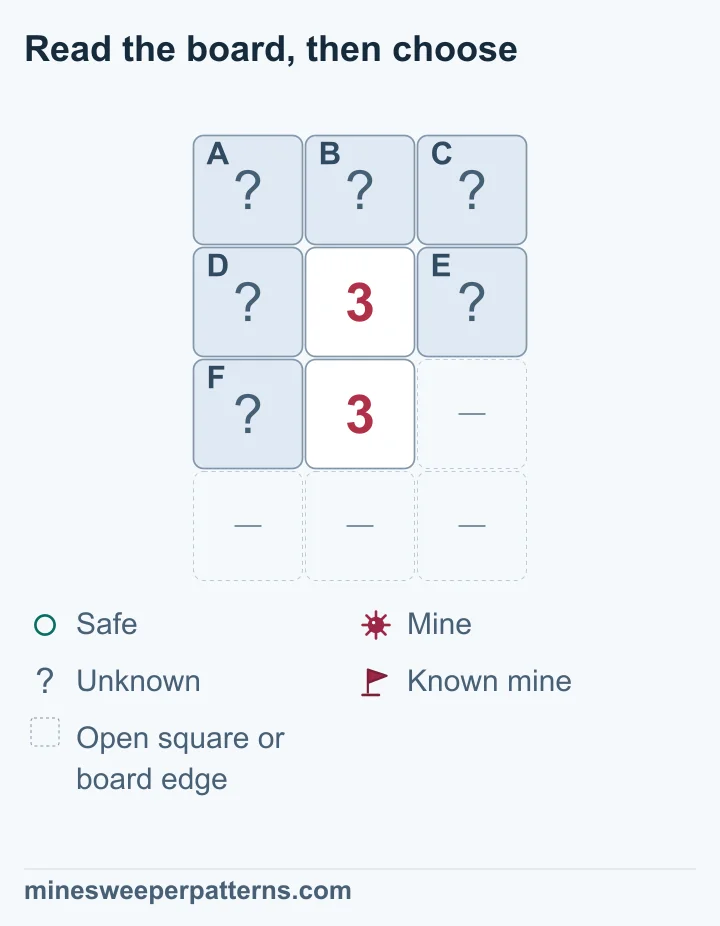
The shared group already supplies the upper 1’s mine. All three top squares are safe. The same comparison works with 2 above 2 or 3 above 3. With 2-2, two mines remain among D, E and F. With 3-3, all three shared squares have mines.
The rule
The lower 1 touches three unknown squares: D and E beside the upper 1, and F to the lower 1’s left. The upper 1 touches those same squares plus A, B and C in the top row.
What to check
Match the shown shape, including the open square to the lower clue’s right and the open row below. The lower clue’s unknown squares must all touch the upper clue. Equal numbers alone do not give this result.
The lower 1 touches three unknown squares: D and E beside the upper 1, and F to the lower 1’s left. The upper 1 touches those same squares plus A, B and C in the top row.
ABCD1EF1
Choose a covered square. Then decide whether it is safe, has a mine, or needs more information.
Why this answer is correct
A: Safe · B: Safe · C: Safe · D: Not enough information · E: Not enough information · F: Not enough information
The shown covered squares are the only unknown squares around these numbers. Gaps stand for open squares or the board edge. Check every nearby square before you apply the result. Flags in these examples mark known mines.
Try the same idea with other numbers
Read the board, then choose
Try the same idea with other numbers
ABCD2EF2
Choose a covered square. Then decide whether it is safe, has a mine, or needs more information.
Why this answer is correct
A: Safe · B: Safe · C: Safe · D: Not enough information · E: Not enough information · F: Not enough information
The shown covered squares are the only unknown squares around these numbers. Gaps stand for open squares or the board edge. Check every nearby square before you apply the result. Flags in these examples mark known mines.
Try the same idea with other numbers
Read the board, then choose
Try the same idea with other numbers
ABCD3EF3
Choose a covered square. Then decide whether it is safe, has a mine, or needs more information.
The shown covered squares are the only unknown squares around these numbers. Gaps stand for open squares or the board edge. Check every nearby square before you apply the result. Flags in these examples mark known mines.
Privacy
Your game records stay in this browser on this device.