Minesweeper 1-3-2 Pattern

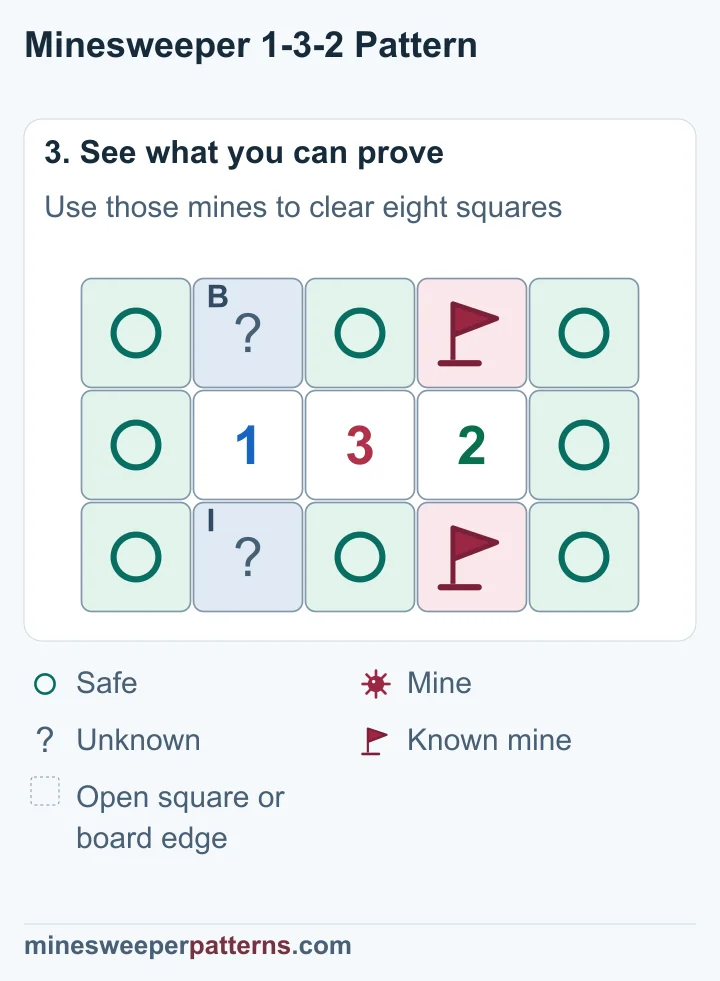
The numbers 1-3-2 sit in the middle row of a three-row, five-column board. Covered squares surround them. Two mines sit directly above and below the right-hand 2. Eight other squares are safe.

See the pattern step by step
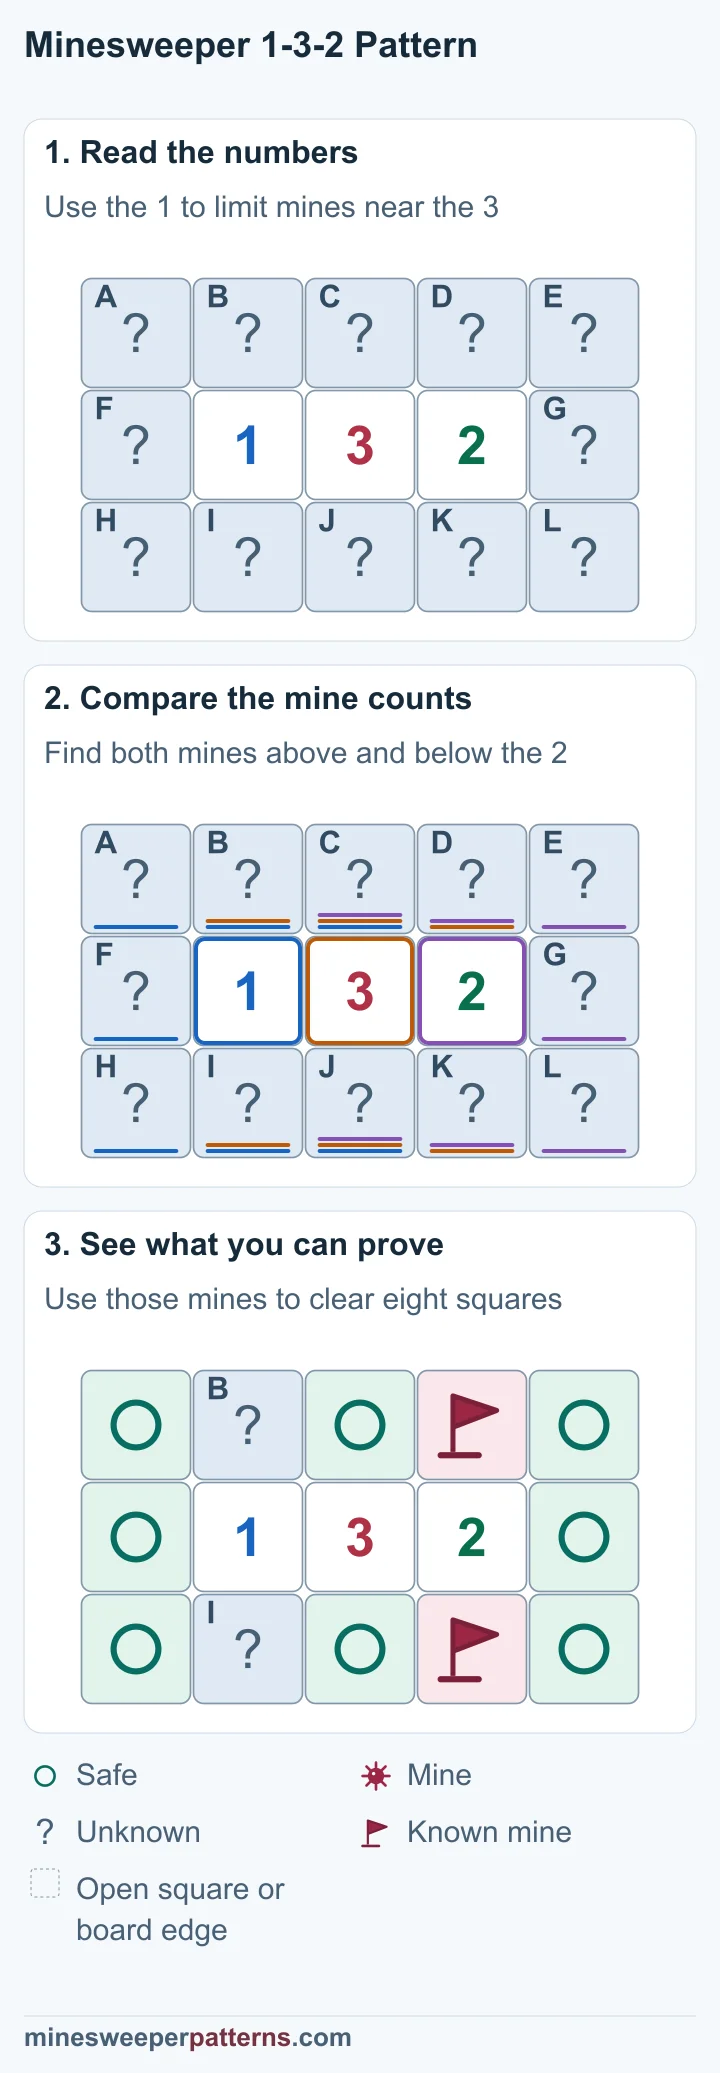
Comparing 1-3-2 proves two mines near the 2 and eight safe squares, while the pair near the 1 remains unresolved.
Download image

Board example

The 3 needs three mines. At most one can be in the four squares above and below the 1 and 3. Both remaining squares, directly above and below the 2, must have mines.

Before
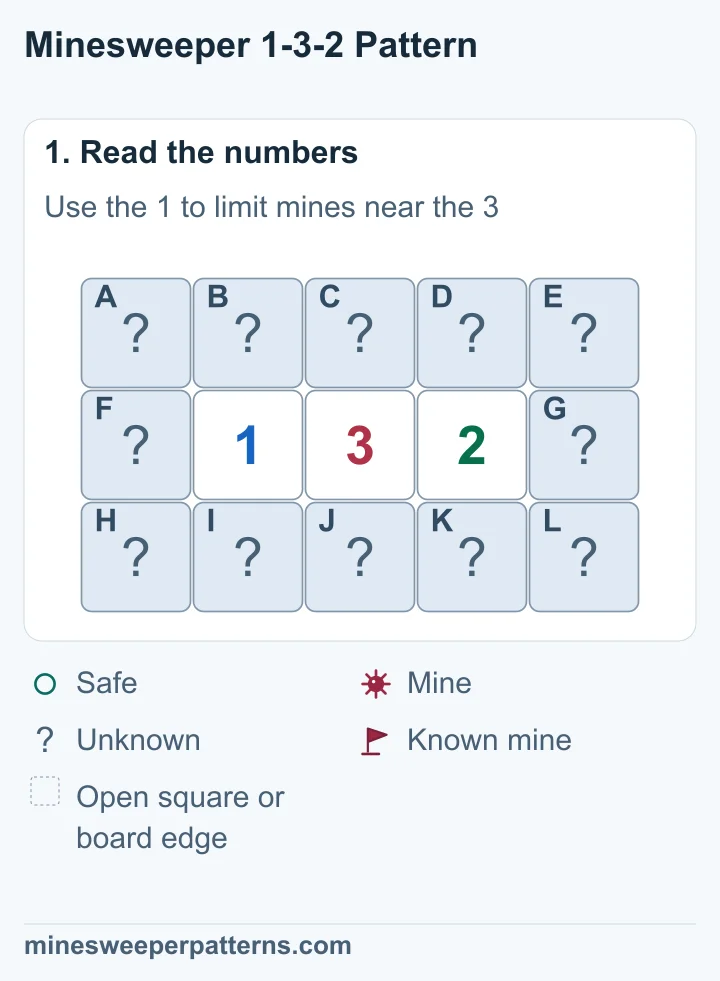
A centered 1-3-2 row has five covered squares above, five below, and one covered square at each end.

After

Two flags mark mines above and below the 2, eight circles mark safe squares, and two covered squares share one unresolved mine.

Why it works

Those two mines fill the right-hand 2’s count. The squares above and below the 3 are therefore safe, as is the far-right column. The 3’s last mine lies above or below the 1. That fills the 1’s count and clears the far-left column. Eight squares are safe; the pair above and below the 1 remains unknown.
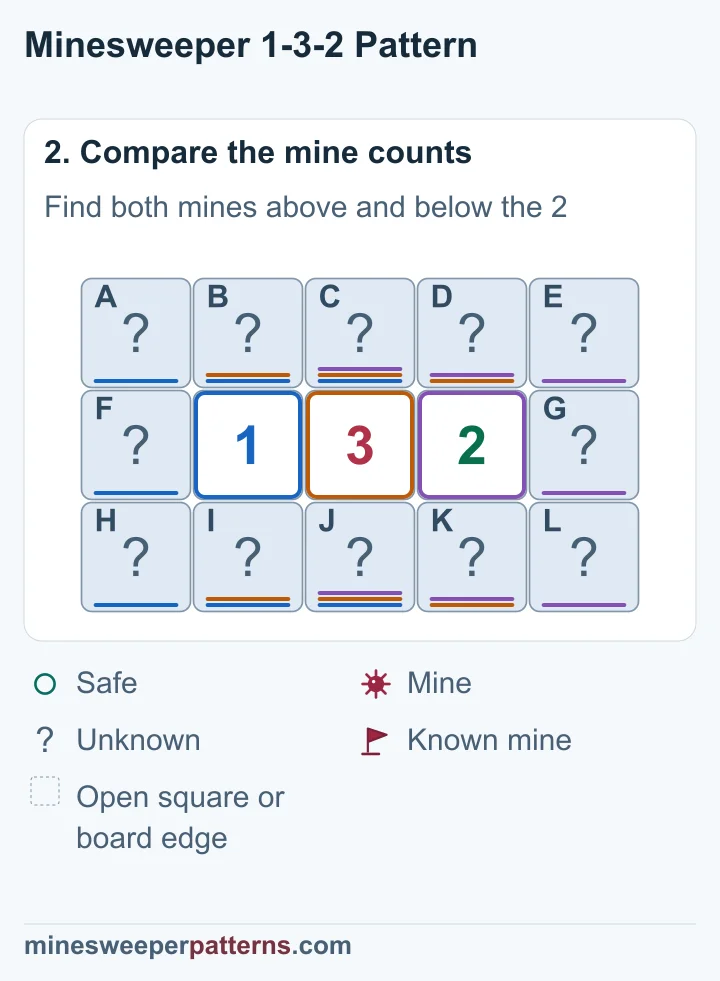
The 1 limits mines near the 3, forcing both squares directly above and below the 2 mined.

The rule

The middle 3 touches six unknown squares in the rows above and below it. The left 1 limits mines in the four of those squares closest to it. They can hold at most one mine in total.

What to check

Match the full board: five covered squares above, five below, and one beside each end of the number row. The mines are in row 1, column 4 and row 3, column 4. The two remaining unknown squares are in column 2.
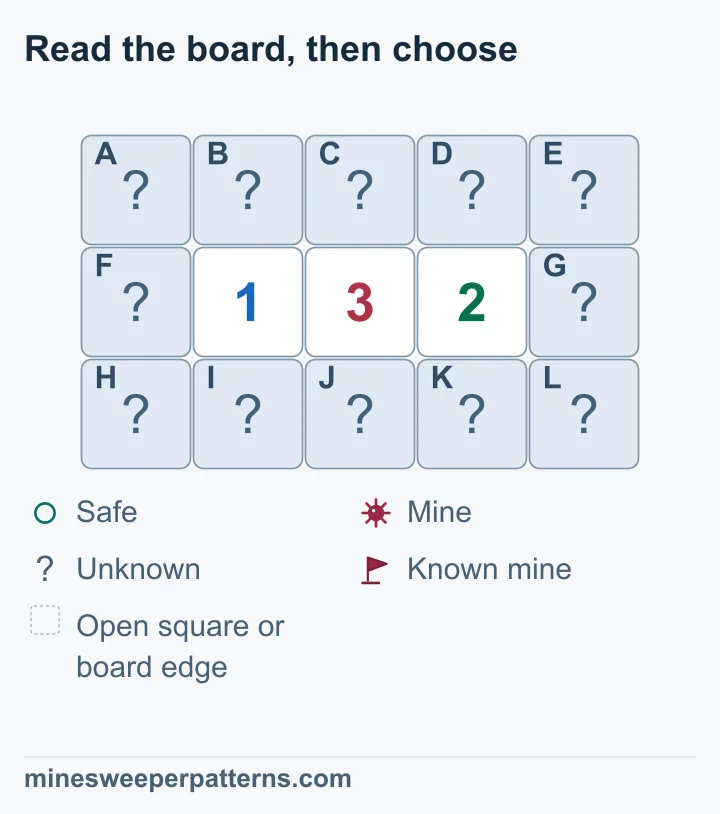
Read the board, then choose

The middle 3 touches six unknown squares in the rows above and below it. The left 1 limits mines in the four of those squares closest to it. They can hold at most one mine in total.

The 1-3-2 clues prove mines above and below the 2 and eight safe squares; one mine remains unresolved near the 1.

Choose a covered square. Then decide whether it is safe, has a mine, or needs more information.

A
B
C
D
E
F
G
H
I
J
K
L
Why this answer is correct

A: Safe · B: Not enough information · C: Safe · D: Mine · E: Safe · F: Safe · G: Safe · H: Safe · I: Not enough information · J: Safe · K: Mine · L: Safe

The shown covered squares are the only unknown squares around these numbers. Gaps stand for open squares or the board edge. Check every nearby square before you apply the result. Flags in these examples mark known mines.

Privacy

Your game records stay in this browser on this device.