How to Find Safe Squares in Minesweeper

A 1 means there is one mine around it. Once you find that mine, the other squares around the 1 are safe. You can use the same idea with larger numbers.

See the pattern step by step
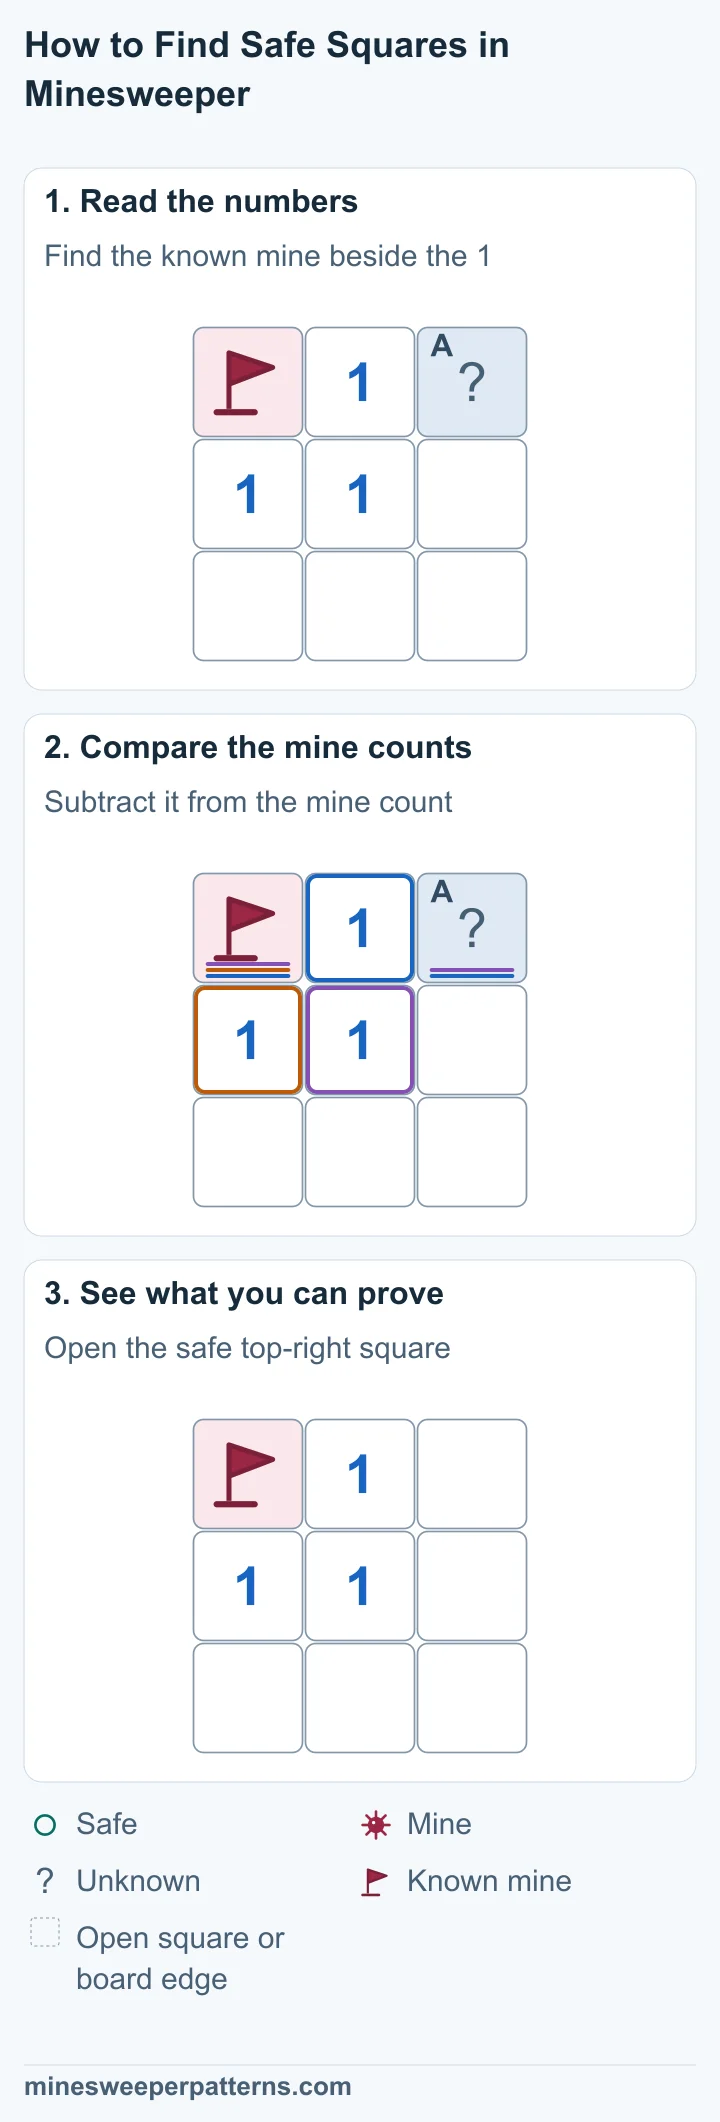
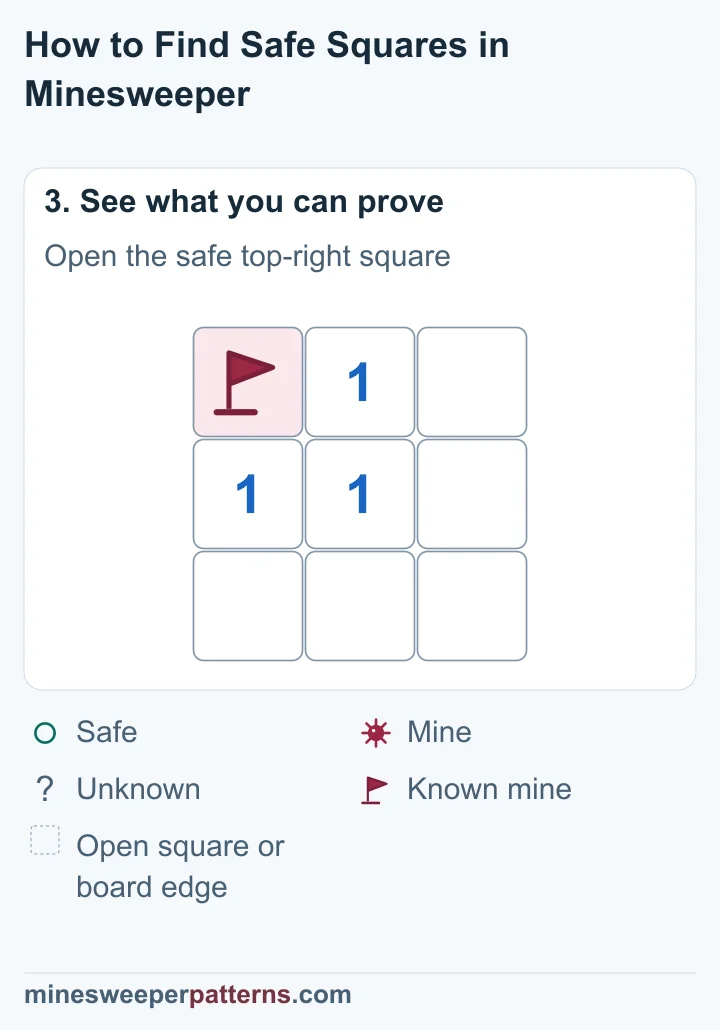
A 3 by 3 board has a known mine at the top left. A 1 and a covered square complete the top row. The lower rows are open. The top-middle 1 touches the flagged mine on its left and the unknown square on its right. Its one mine is found, so the unknown square is safe. The top-right square is open and empty, with no number. The top-left mine stays flagged. The three 1s elsewhere on the board stay the same.
Download image

Board example

The middle 1 touches a known mine at the top left, marked with a flag. The top-right square is covered. Every other square around the 1 is open and safe.

Before
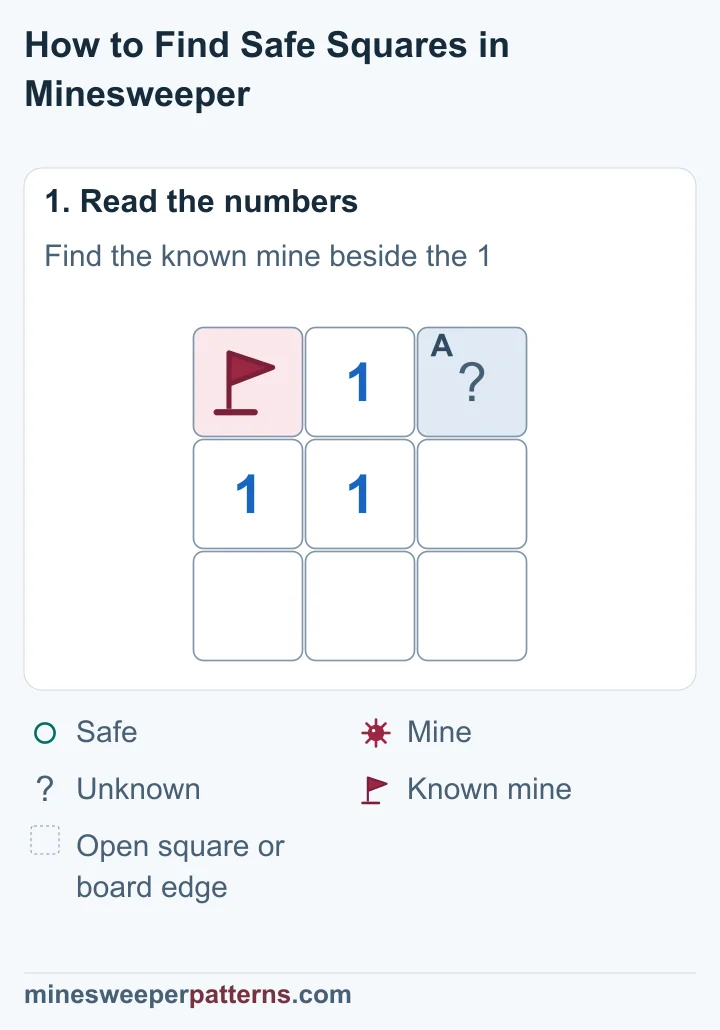
A 3 by 3 board has a known mine at the top left. A 1 and a covered square complete the top row. The lower rows are open.

After

The top-right square is open and empty, with no number. The top-left mine stays flagged. The three 1s elsewhere on the board stay the same.

Why it works

The top-left mine is the one mine that the 1 counts. A mine at the top right would make two. So the top-right square is safe to open.
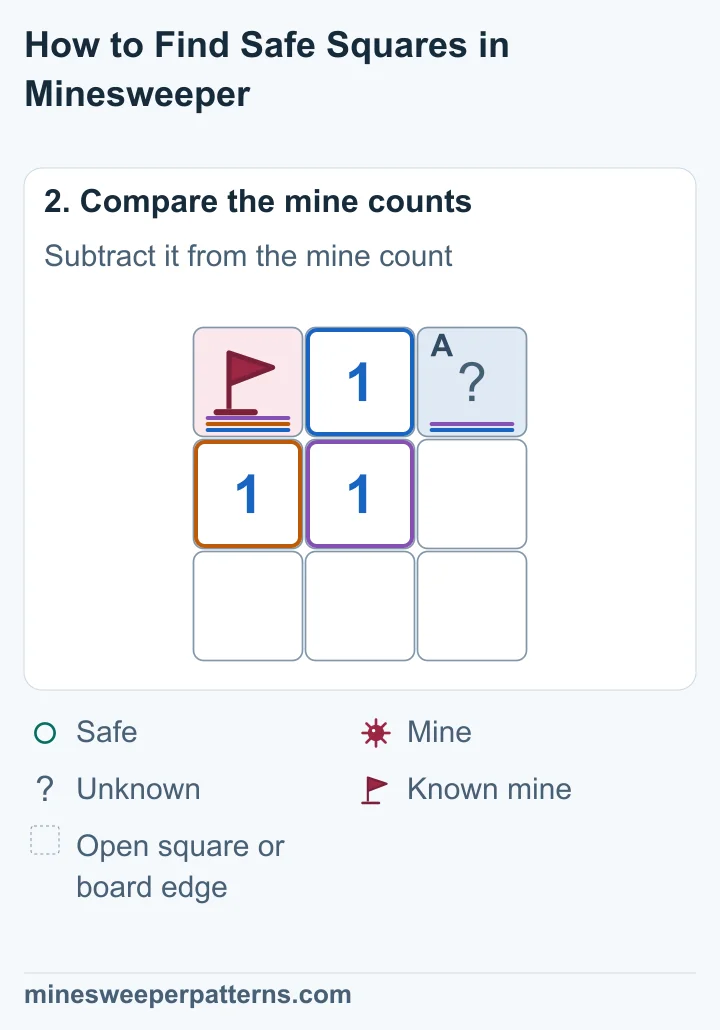
The top-middle 1 touches the flagged mine on its left and the unknown square on its right. Its one mine is found, so the unknown square is safe.

The rule

Use the numbers to find all the mines counted by one number. Once they are all known, its other nearby squares are safe to open.

What to check

Check the corners around the number too. Use the numbers to check each flagged mine. When the flag count matches an open number, clicking it opens its other covered neighbors. This is called chording. A wrong flag can cause you to open a mine.

Open nearby squares with one click

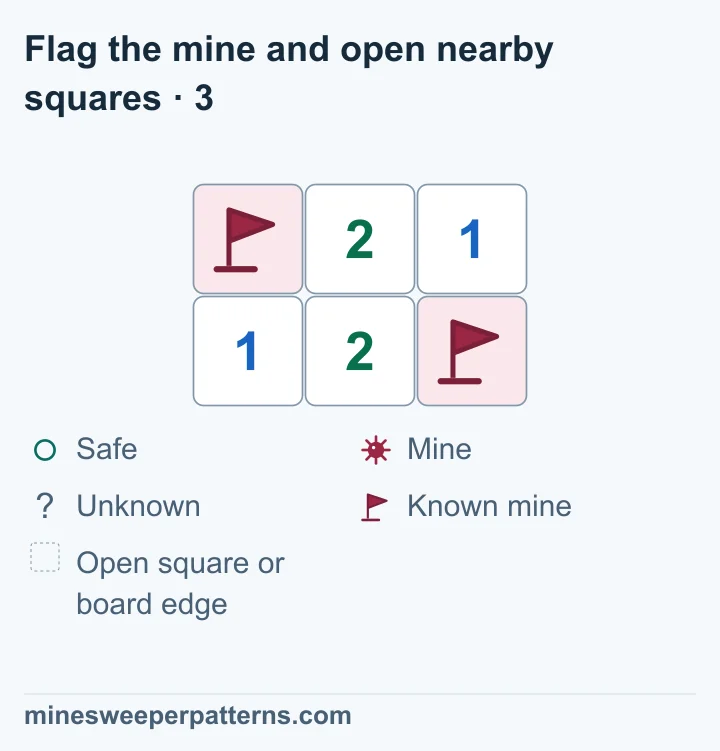
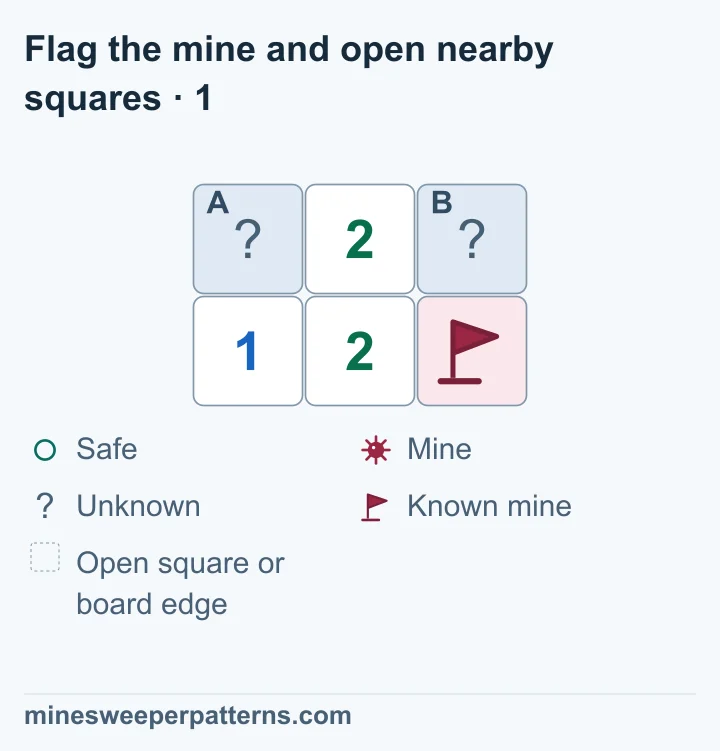
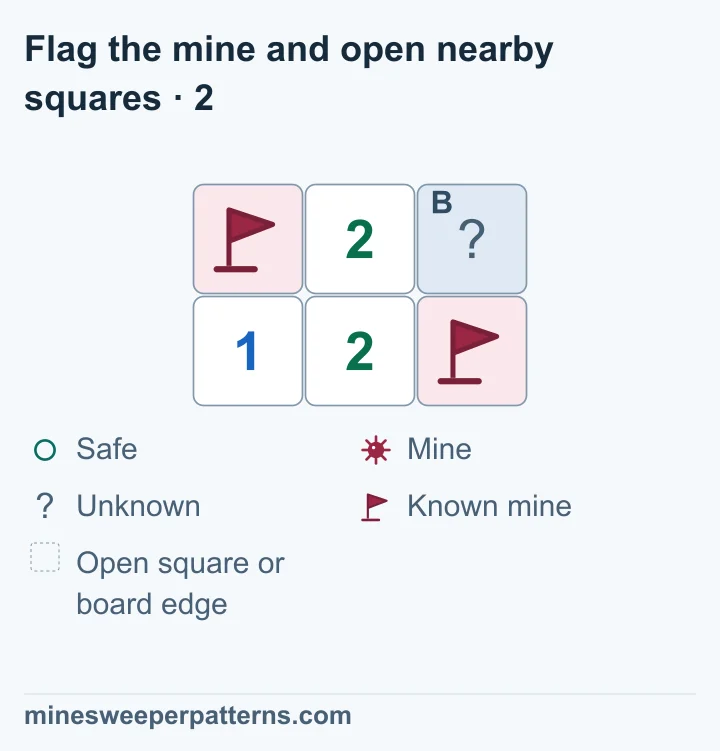
In the three-frame example, the lower-left 1 proves that A at the top left has a mine. Flag A with a right-click, Shift-click, or a long press on a touchscreen. The lower-middle 2 now touches two known mines with flags. Click that lower-middle 2 to open B at the top right. B shows 1. Opening a number’s other neighbors this way is called chording. Check that each flag marks a mine proved by the numbers.

Try this pattern

Use the numbers to choose your next move. Include the corners when you count. Squares outside the picture are open. Each flag marks a known mine.

Select every square you can prove safe.

⚑111

See why

The top-left mine is the one mine that the 1 counts. A mine at the top right would make two. So the top-right square is safe to open.
Flag the mine and open nearby squares

The lower-left 1 proves that A at the top left has a mine. Flag A. The lower middle 2 now touches two flagged mines. Click that 2 to open B at the top right. B shows 1. Use this new number to find your next move.

1

A two-row, three-column board shows covered A, 2 and covered B above 1, 2 and a flagged mine. The lower-left 1 proves A has a mine. B remains covered.

2

A at the top left now has a flag. The lower-right flag remains. B at the top right stays covered. The lower-middle 2 touches both flags and can open B.

3

B at the top right is open and shows 1. Flags remain at the top left and bottom right. The other numbers stay the same.

Check each flagged mine with the numbers. When the flag count matches an open number, clicking it opens all its other covered neighbors.

Start a practice round

Privacy

Your game records stay in this browser on this device.